During the summer, I tasked myself with laying hardwood floors in our upstairs hallway and master bedroom. I've installed hardwood floors in the past, but I usually had help from my father-in-law. This time, I borrowed his tools and tackled the project myself. I did however have some help from my pregnant wife and mother-in-law (organized hardwood, vacuum, etc.) but all in all, I'd like to think that I successfully installed the flooring myself!
 |
| Master Bedroom complete |
Tools
Like any project, it is necessary to have the proper tools for the job. Luckily, my father-in-law had all the power tools I needed, which saved me a ton of money. Here's a list of the items needed in order for a smooth experience:
- Air Compressor - For use on the nail gun and flooring nail gun
- Nail Gun - For baseboards, beginning and end of the hardwood floor runs and any awkward portions that a Flooring Nail Gun can't fit.
- Flooring Nail Gun - The main tool you'll be using for the middle section of the hardwood floor
- Flooring Nail Gun Hammer - To strike the Flooring Nail Gun
- Staple Gun - Not necessary, but helpful for keeping the felt down
- Power Screwdriver - For screwing things in
- Long screws - For any loose floorboards that need to be screwed down before laying down the hardwood
- Utility Knife - For cutting up the carpet and padding
- Duct Tape - Because who doesn't need duct tape?
- Crowbar - Helpful from pulling baseboards and prying hardwood floor in tight spots
- Pliers - Pulling nails and staples after carpet/padding removal
- Carpenters square - For when you measure cuts on the hardwood
- Tape Measure - For measuring
- Carpenter pencil - For making marks on the wood
- Knee Pads - You'll be on your knees a lot
- Eye protection - Of course
- Work gloves - It's just helpful having good work gloves. Don't have to worry about banging your finger, getting cut or pinched by the wood
- Hammer - For hammering
- Wood Chisel - Helpful when chiseling out pieces of wood in doorways
- Undercut Door-jam saw - Helpful when needing to cut the bottom of a door-jam in order for the hardwood to fit properly
Material
- Hardwood floor - Make sure to leave inside the room that you'll be laying it in for a few days for it to be acclimated
- Transition wood for woods with carpet, or previously laid down hardwood rooms
- Hardwood landing tread - if working on a staircase, it's the top piece
- Baseboards - Unless you are reusing the existing ones
- Nail Gun Nails
- Floor Nail Gun Nails
Before
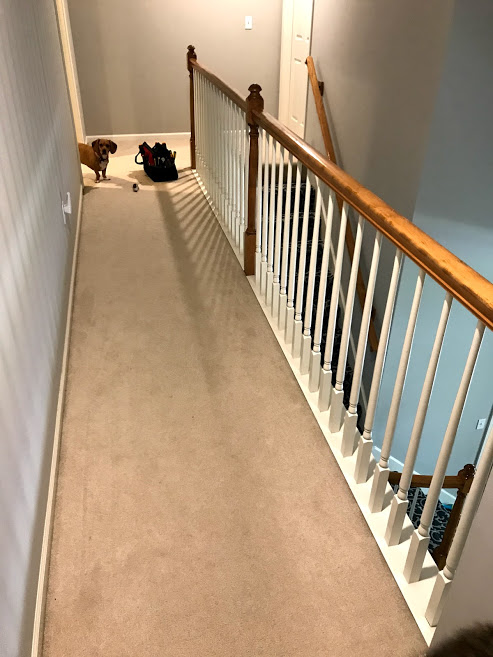
Unfortunately, I only took a picture of the hallway and not the master bedroom. But here's the upstairs hallway:
 |
| Upstairs Hallway from stairway |
 |
| Upstairs Hallway from end of hall |
Removing Carpet, Padding and Staples
Next, I had to remove all the carpet, padding and staples. Knowing that we were going to replace the base boards, I just took a knife and cut along the edge of the base boards and removed them from a crowbar. Once they were removed, it was easy enough to rip up the carpet from the tack strip. I made sure to cut the carpet in small manageable pieces, rolled them up and duct tape them.
 |
| Carpet removed in Hallway |
 |
| Removing Carpet in hallway/bedroom transition |
I did the same for the padding too. Removed, rolled and duct taped.
 |
| Padding removed from Hallway |
 |
| Carpet and Pad removed from Hallway and part of Bedroom |
After removing the carpet and padding, the next step was to remove all the staples and tack strips that kept the carpet and padding down. This is a very tedious job since it required carefully examining the sub floor, finding the staples and using pliers to remove. There are tools out there that can "scrape" the staples up, but I chose to do them by hand. I actually have that tool but I didn't think it worked that well. Additionally, most of the staples will be bundled in the same row since that's what the previous contractor did when they staples the padding in so it wasn't that hard to find. The reason we remove all these staples is to have a smooth surface for our hardwood.
 |
| Carpet, Padding and Staples removed from Hallway |
This is also a great time to walk the area and listen for any loose boards. I found a few and just bought some 2 inch screws and screwed them into the floor to eliminate the squeaking.
Laying down Hardwood
Now that we have our carpet removed, I then laid down a roll of felt paper. I used a staple gun to temporarily hold down the ends in place.
 |
| Felt down in Bedroom and beginning flooring |
I then started started in the far corner of the bedroom where the window is. I had a little issue with the initial width since the base of the window comes out a little more than the wall. However, with some measuring and precision cutting with a table saw, I was able to get the first row nice and straight. I used a nail gun on the first few boards since they were the most fragile and can't withstand the hardwood floor gun.
 |
| First few rows by window in bedroom |
 |
| Another few rows complete in bedroom |
At this point, I started to build a rhythm. Honestly, the most time consuming part during the actual hardwood section is the beginning, end and any doorways. The middle area flies by since it doesn't really require much measuring.
 |
| Continuing in the bedroom |
The only real measuring portion in the middle section is at the very end of the run. I just made sure I measured properly and cut the correct end of the board and I was fine. Even if I wasn't directly even with the wall, the baseboard that was being installed is thick enough that it should cover up any uneven ends.
 |
| Day 1 complete |
By the end of the second day, I was nearly complete.
 |
| Looking from the window into the bedroom |
When I was nearing completion of the bedroom, I started laying out some extra pieces of baseboards that I had from another room. I did this for no reason but to see what it would look like toward completion.
 |
| Bedroom flooring complete |
At this point the flooring was complete in the bedroom. I started moving furniture back in that I had stored in the bathroom and other rooms. It was nice to have the bedroom back! However, I still needed to work on the baseboards.
 |
| Top of stairs |
The top of the stairs was one of the more difficult parts. This required a special piece of wood that was $50 alone. It was a long board, but not long enough to where if I messed up, I would have a backup. I made sure to measure, re-measure and measure again before any cuts. I also had to make sure the 2 pieces of wood perpendicular on the staircase was also measured and fitting properly too. It took a few hours but once it was done, it was done right.
 |
| Top of staircase |
After I finished the part of the staircase, I decided I would go back and complete the baseboards in the bedroom. I didn't have any pictures, however I do have the end result of the room.
 |
| Bedroom complete |
With the bedroom complete, I continued onto the hallway. This wasn't too bad since the boards ran in parallel with the length of the hallway and did not require many cuts.
 |
| Continuing into the hallway |
The hardest part was the thin strip along the wall. Luckily they didn't have to be the exact size, since again, the thickness of the baseboards would cover it up.
| Transition piece from hallway to bedroom #2 |
I had already put down hardwood flooring in Bedroom #2 and stopped at the edge of the door. Since the 2 rows of hardwood were completed at different times, it required using a transition piece to put on top of the 2 separate runs as shown below.
| Busted first transition piece |
I busted the first transition piece since I was too close to the edge with my nail gun. Luckily the transition pieces are fairly inexpensive.
Baseboards
Once I finished the hardwood in the hallway, it was time to move onto the baseboards. Baseboards aren't too difficult. It just requires measuring correctly and taking into account which 45 degree angle you need to cut. I made sure to make the proper notes on a sheet of paper and drew the shape that baseboard that was needed for each section.
 |
| Unfinished baseboard |
As you can see above, there's visibility in the gap between the connections of the baseboards. Luckily there's caulk! I used white caulking and put it along the very top of the baseboard run and the perpendicular corner seems. This cleaned it up nicely. Additionally, when nailing in the baseboards, you'll first want to find the studs in the walls, since you'll be nailing in the baseboards directly into the wall and it requires a stud to keep it securely to the wall.
 |
| Hallways Complete! |
At this point, the project was complete! It took a few separate weekends to finish since I did this myself. My wife would usually help but since she was 7 months pregnant, I didn't want her to do too much. Luckily this is a job you can do yourself, as long you have the right tools, time and patience!
It's also worth noting how many stairs I went up during this time. I think I did like 70 flights each day I worked. It's a great workout too!
Hope this inspires anyone that wants a DIY project for laying down hardwood!
Until next time.
Hope this inspires anyone that wants a DIY project for laying down hardwood!
Until next time.